
Following on from the cooling system article I would like to share my findings on fitting a cooling fan to my M Type. The fan I used was a Tripac 14″ two speed fan which I bought from Merlin Motorsport at Castle Combe. I also purchased a Revotec fan temperature control unit to switch the fan on when things got hot.
Further to this a fan overide switch was also purchased, with ( OFF AUTO ON ), OFF is cooling fan off. AUTO is cooling fan controled by temperature rise and fall. ON is fan on at all times.
Usually an electric fan is fitted directly against the radiator core but I decided to fit it about 2″ away from the radiator on some purpose made brackets. The fan itself is quite large and is deeper in construction than say a Revotec unit of the same size, but in the end I stuck with it as it had two speeds which may be useful.
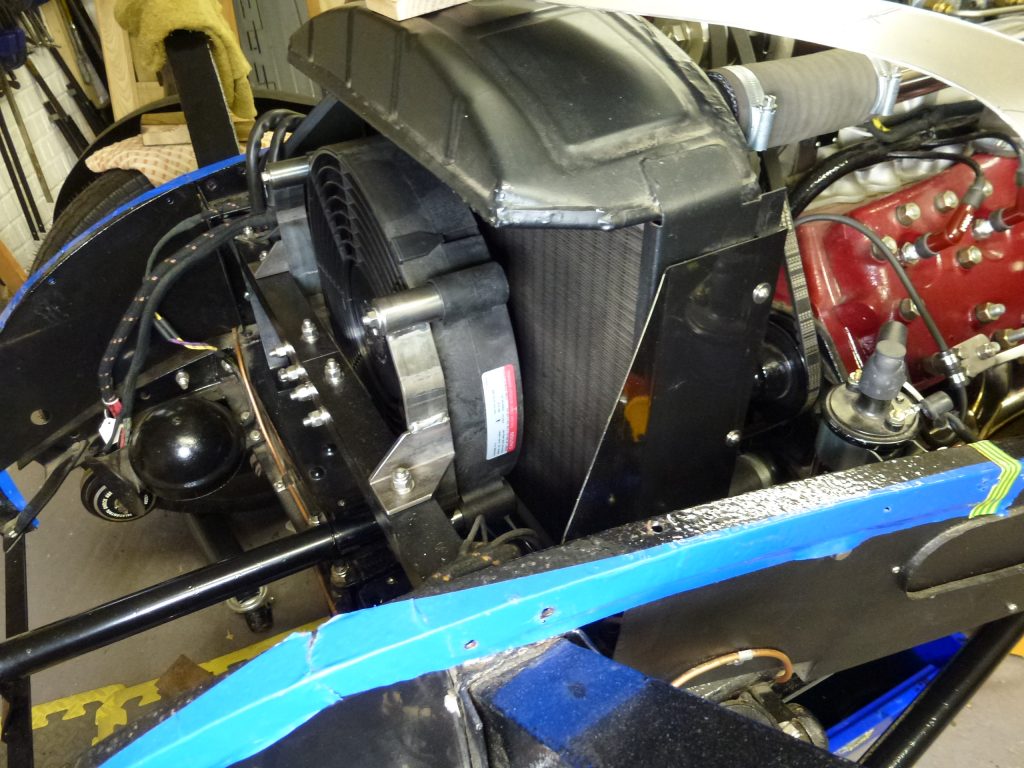
The fan is attached via two brackets to the crossbar just in front of the radiator. This crossbar braces the two chassis uprights above the front leaf spring. Hopefully mounting the fan in this way will allow air to pass around it in normal driving when not in use.
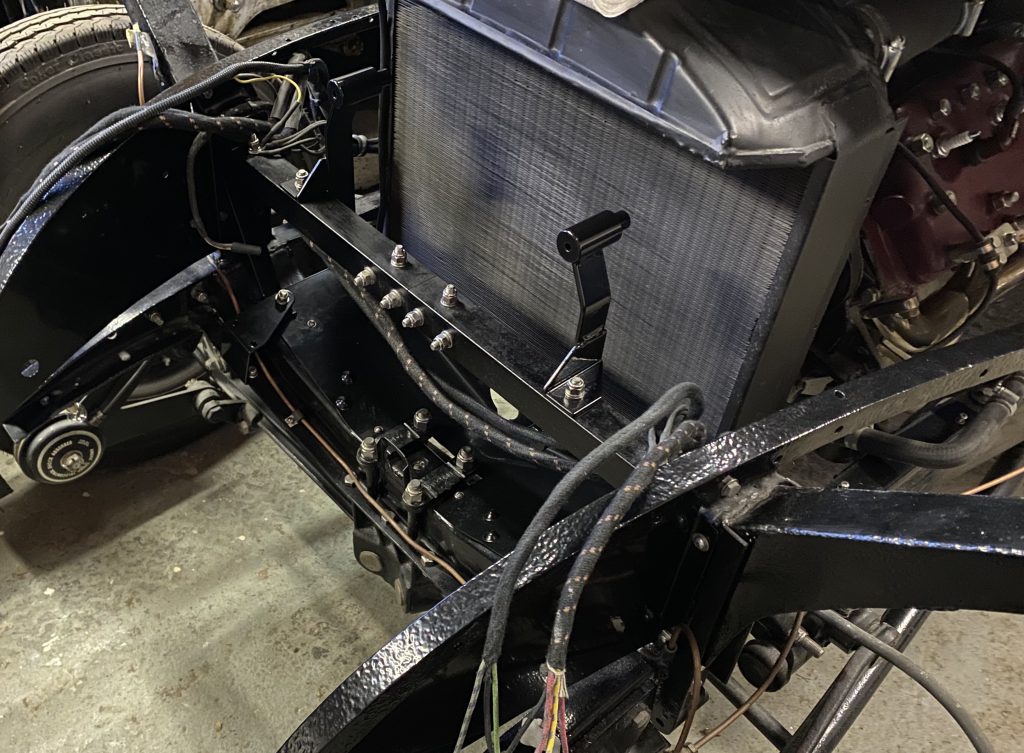
The fan is controlled via a Revotec temperature control unit and relay, this was also purchased from Merlin Motorsport. As mentioned previously, the fan has two speeds, these are called ( High Power and Low Power ) . This description turned out to be not quite correct, this came to light when doing some testing as will be explained later.
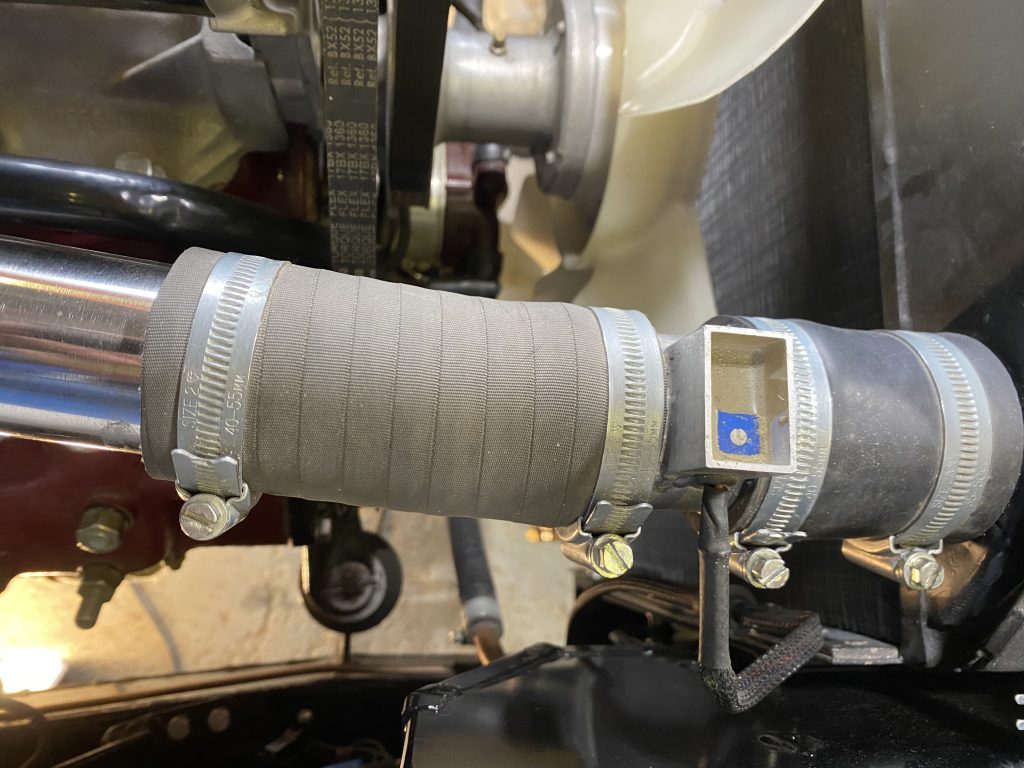
The Revotec temperature control unit consists of an aluminium tube with an adjustable temperature control pot. The aluminium tube is inserted into the top hose going from the cylinder head to the radiator. This happens to be on the drivers side on my M Type, but can be either. Supplied with the temperature control unit is a 30amp relay to switch the fan on when needed. This 30amp relay was subsequently changed as will be explained further on.
After a period of time when all the work had been done for attaching the fan plus the control unit and relay, it was time to test the fan out. This was just a standstill test without the engine running. With the fan connected to run at High Power the current draw was 24amps at full speed and a peak starting current of around 80amps !
This was way more than I was expecting, so I connected the fan to run at Low Power and lower speed or so I thought. The fan current in low power was 20amps at full speed, with a peak starting current of around 60amps!
The 30amp relay that came supplied did not take to kindly to this sort of current and got quite warm, I think it would of failed eventually. Further more this test was done without any fuse protection. Even with a 30amp fuse in line I think this would also have blown eventually due to excessive peak starting currents.
I do have to say this Tripac fan is a powerful fan in either high or low speed setting. A Revotec single speed fan is around 14-16 amps at full speed, and may have been the better option. With that said, I connected the Tripac Fan unit up to run in the low speed setting. This I thought would be ok but alas it was not to be, so what should I do ?
Eventually after reading many articles online I came across one that was started in 2019 on a Corvette Forum in the USA on overheating and cooling. This involved using a fan controller to control the speed of the cooling fan rather that switching the fan on direct with a relay to full speed as in my case. Picture, 44 or 45
The fan controller that came out as a good all round unit was a 1355A fan controller. These are used by Mitsubishi and Mazda on their cars. The fan control module is designed to run two fans, so with this in mind I ordered one to test it out.
The fan controller duly arrived but unfortunatly it did not have any connecter plugs. These are the plugs that connect the fans and power to the unit plus a very important control terminal. It is this control terminal that makes this fan controller so adaptable for many reasons.
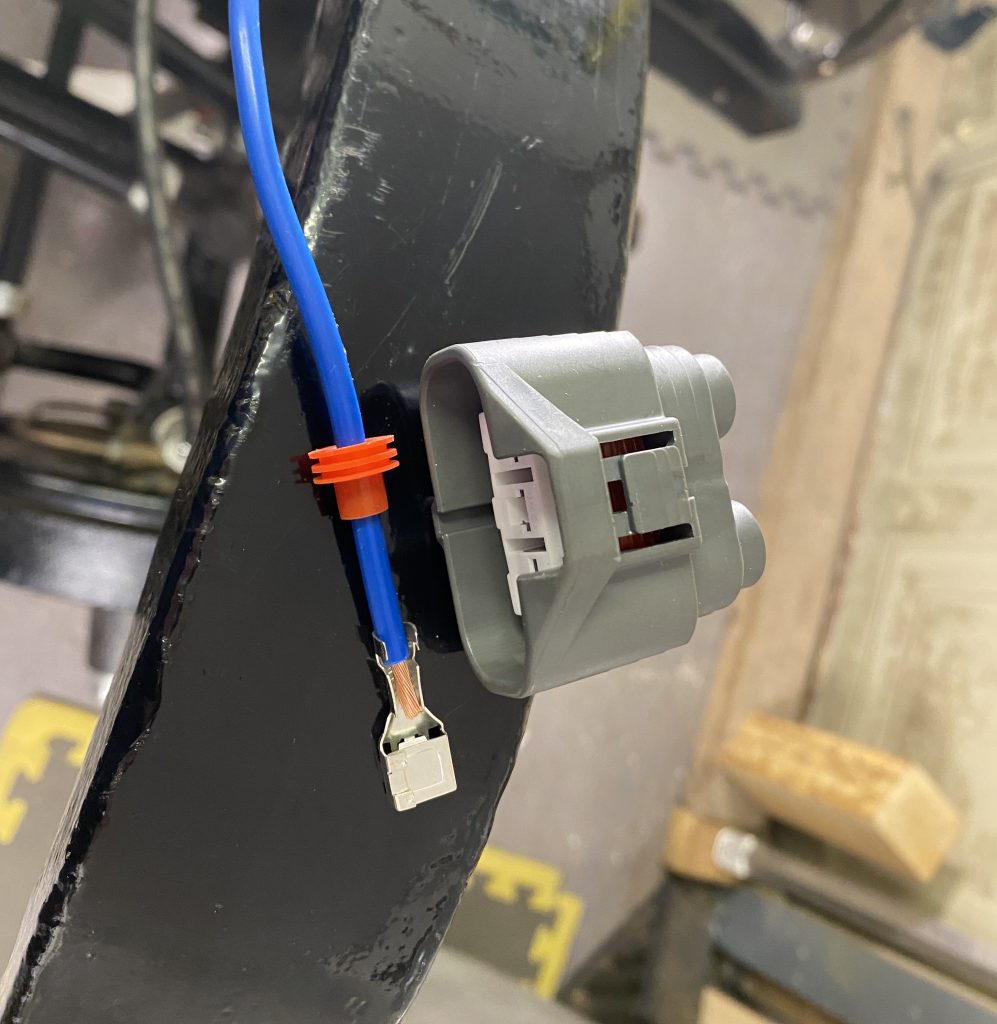
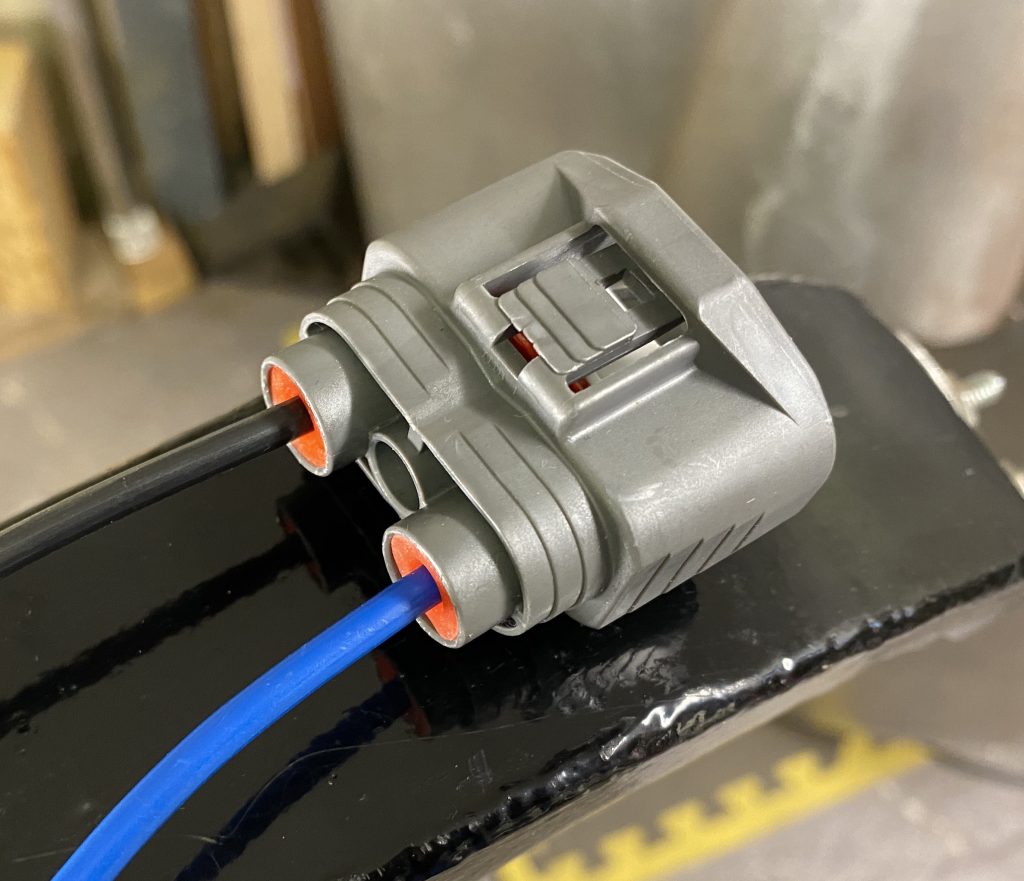
These plugs were available on Ali-express and were OEM original plugs together with the spade crimps and silicone seals. These were ordered and arrived 12 days later.
The fan controller is designed to run two fans via two smaller outlet plugs.
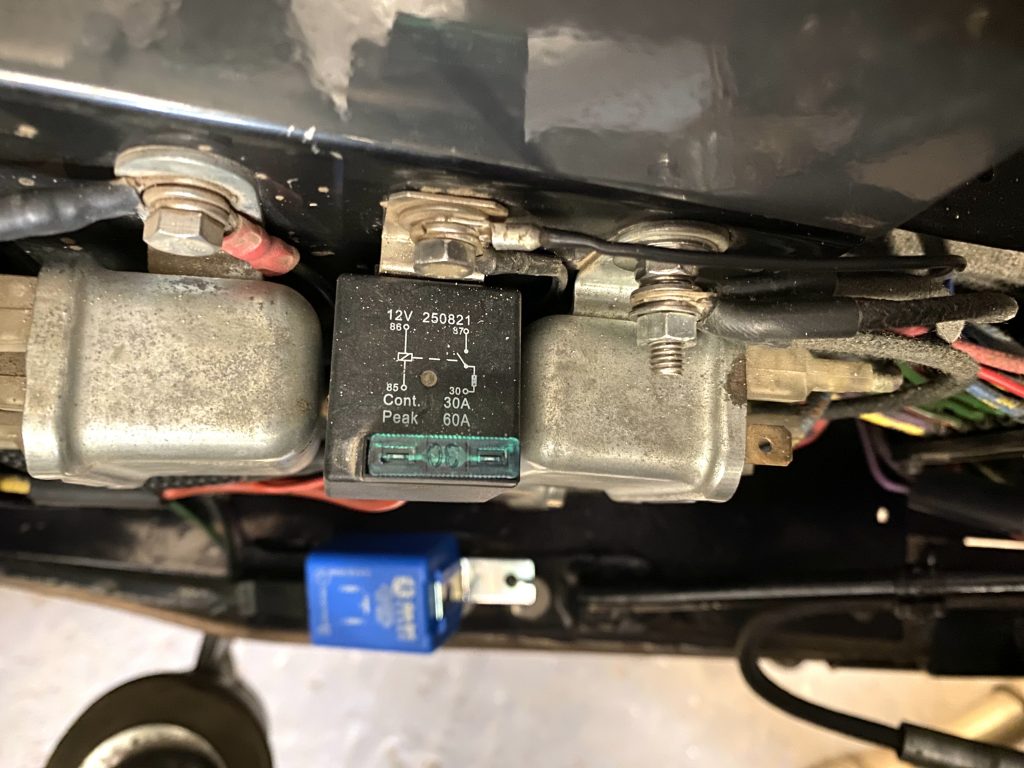
This turned out to be very useful as I needed all three wires of the Tripac fan to be connected to run at the lower power setting. You can see this in the wiring diagram. The main 12volt power comes via a fused relay controlled by the Revotec temperature unit. This fused relay replaced the original Revotec (non fused type) and is rated at 30amps.
The only connection now left is the control terminal (Yellow Wire). This is situated in between the two main power terminals. This terminal is designed to operate with many different signal inputs from black boxes, frequency controllers and ECU’s .
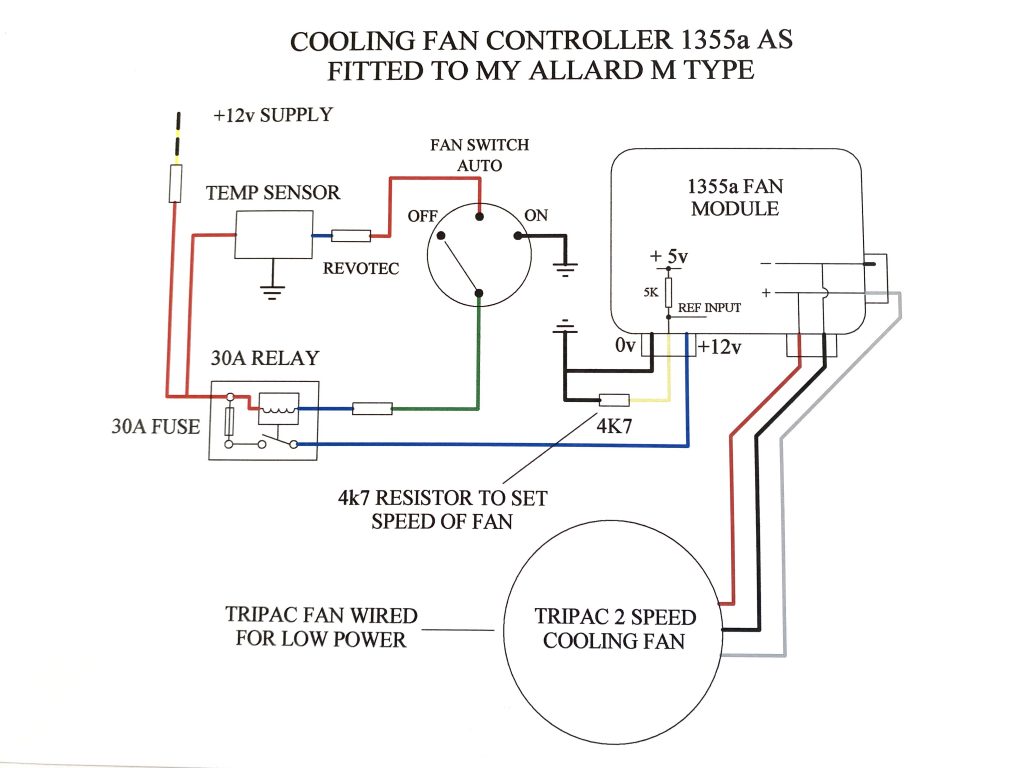
But it has also one redeeming feature. This control terminal has an internal +5v reference applied to the control pin and because of this it is very easy to set the speed at which you want the fan to run too. Further more the fan does not switch on immediately, it slowly ramps up to speed. This is called soft starting.
This soft starting also prevents the high inrush currents that were found on initial testing, 60-80amps.
As mentioned above this Tripac fan is quite powerful therefore I decided to lower the speed down to about half. This was achieved by simply connecting a (4k7) 4700ohm 10watt wire wound resistor from the control terminal to ground ( Yellow Wire ). This resistor was soldered in line in the wiring loom cable and covered with heat shrink. The reason for using a 10watt resistor was for mechanical strength and robustness as the amount of currrent flowing in this control wire is quite small at 10-15 milliamps.
The fan controller was placed on the drivers side area of the nose cone. The fan controller does get warm when in use which is to be expected, but it is designed to operate in this type of environment. When testing the fan controller it was found to soft start and run up to about half speed set by the 4k7 resistor, at a final current of around 10-12amps. When the radiator cools down the fan just switches off and so the cycle repeats. This is in the AUTO switch position. If switched ON to continuious running the fan will soft start in the same way and stay running until you decide to switch it back to AUTO or to OFF as needed.
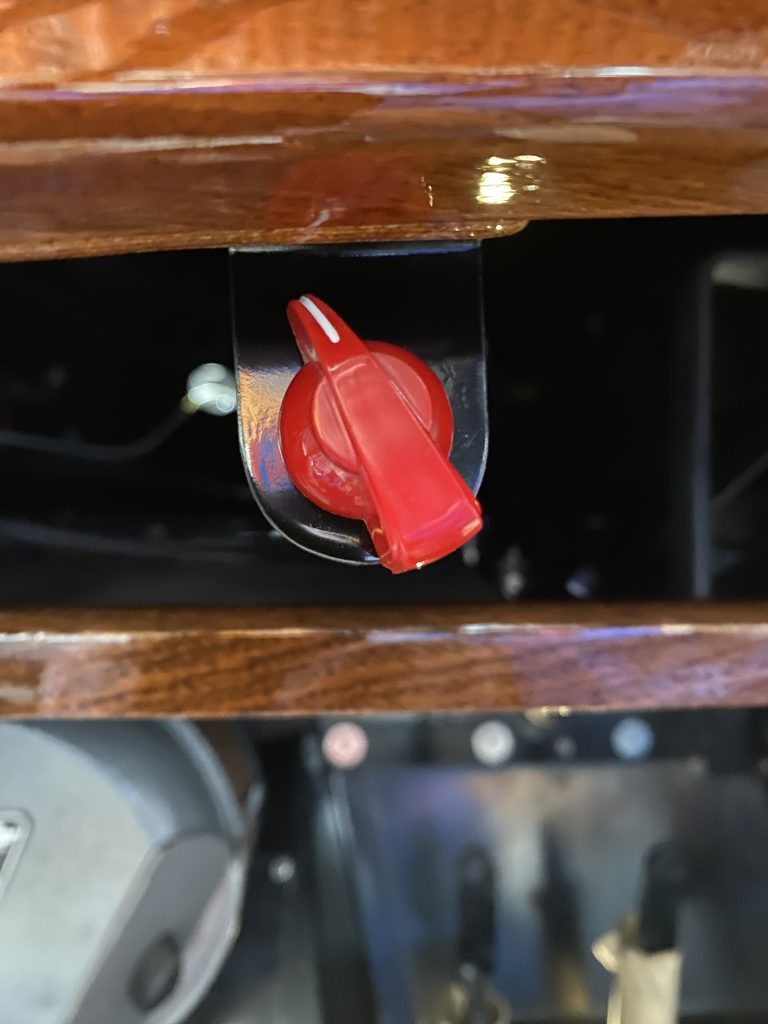
The cooling fan supply is taken directly from the main battery terminal on the starter solenoid and is fused via the 30amp relay. A 20-25amp fuse should be more than adequate for this setup. The fuse is a blade type fuse set into the top of the 30amp relay.
I hope you find this interesting. Using a fan controller like this has many advantages that are not immediately obvious and maybe of some use further down the line in cooling our Flatheads.
Since writting this article I have run the car on one of our hottest days 25-28c for about 45 minutes stopping and starting. The fan switched on at around 185F and kept the temp around 190F with the fan switching on and off as needed, so all in all a good result.
If you have any questions about this article please get in touch and I will happily go through it with you.
Kind regards
Charles Gough
Ps- I must give credit to the Corvette Forum in the USA and all the contributors on their forum. This led me to a better understanding of how to go about using these fan controllers.