
Have you noticed how articles about car restorations typically go on and on about the bodywork, the engine, wiring and trim. But then you read “The axle seemed OK so we just changed the oil.”
Yes, it’s messy, heavy, long-winded and involves jargon. But don’t be afraid, it’s OK so long as you follow the rules and have muscle, space and infinite patience.
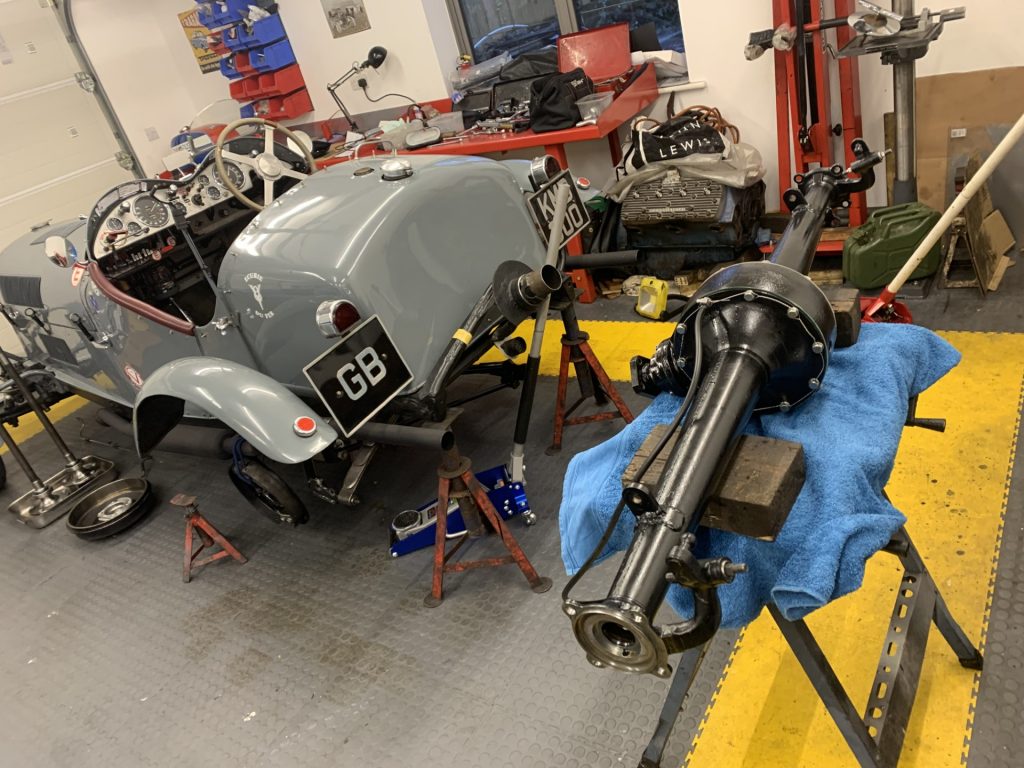
I broke the Ballamy’s axle at the HSCC Oulton Park Gold Cup race in July 2024. My own fault, thinking “The car is going so well…”
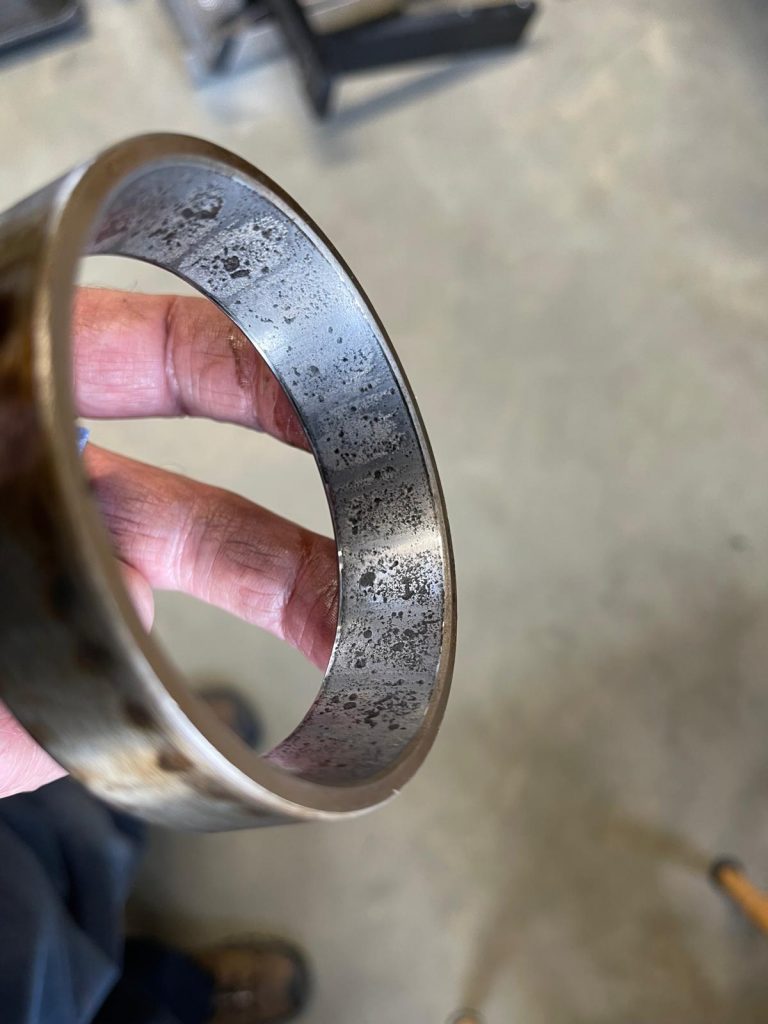
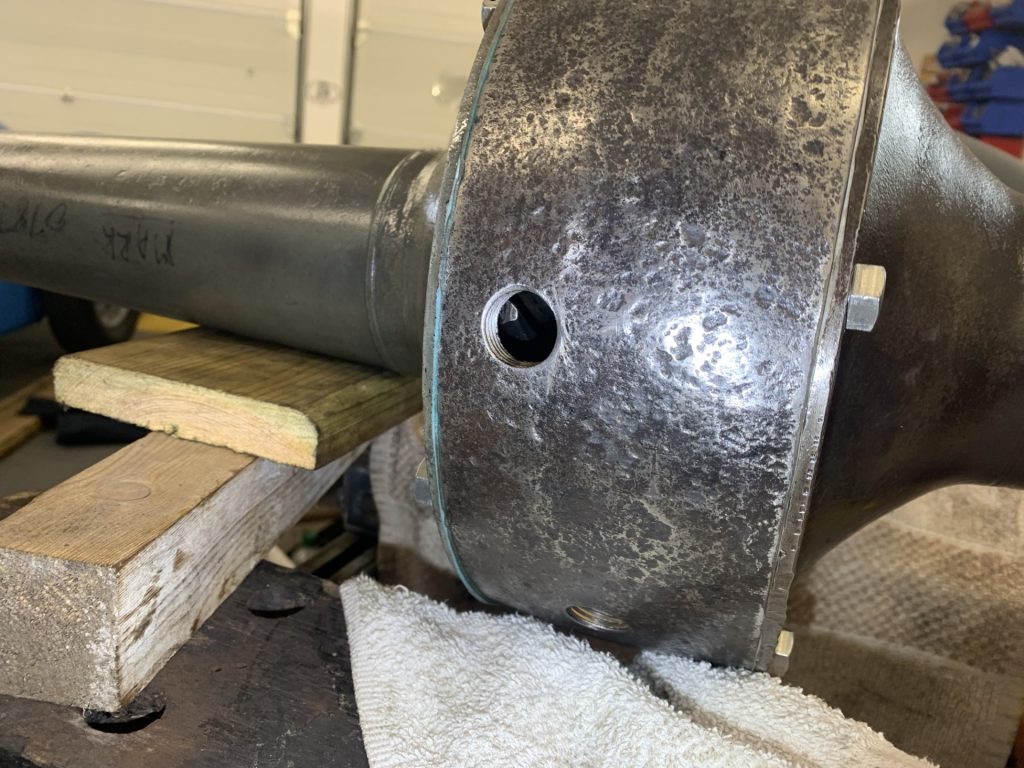
In the photo, the loose collar on the halfshaft snapped off the diff cage, leaving the bearing in thin air. Also, you can see the evidence that when I fitted that worn diff years ago, it needed knurling plus Loctite to locate the bearing.
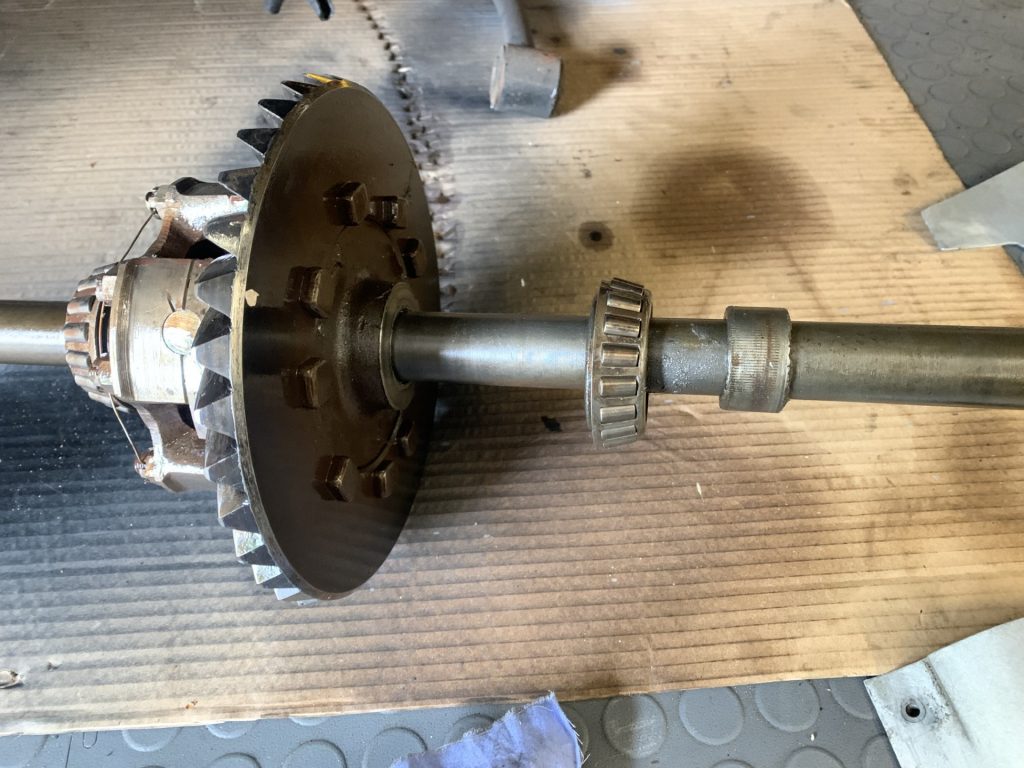
The Ballamy runs a 1932 Ford V8 axle, similar to a Model B, so it’s not up to 200ft/lbs of V8 torque. Ford made the axles stronger every year so that the one in your Allard is essentially the same design but much more robust. Even if you don’t break it, you should go through this rigmarole if you change crown wheel and pinion.
Get prepared, get dirty.
Dismantling is mostly straightforward but the axle is extremely heavy. You need lots of space, vertically and horizontally, and be prepared to clean out stinky, ancient oil. I also have an axle-lift muscle-woman called Pina.
Mark the banjo and axle cases so you know which way they came apart. Keep an eye on where the drain and level holes are.
I put a plastic sheet on the floor to help catch the gloopy, stinky oil. Set-up clearances are so tight, all mating surfaces, threads and bearings need to be spotless.
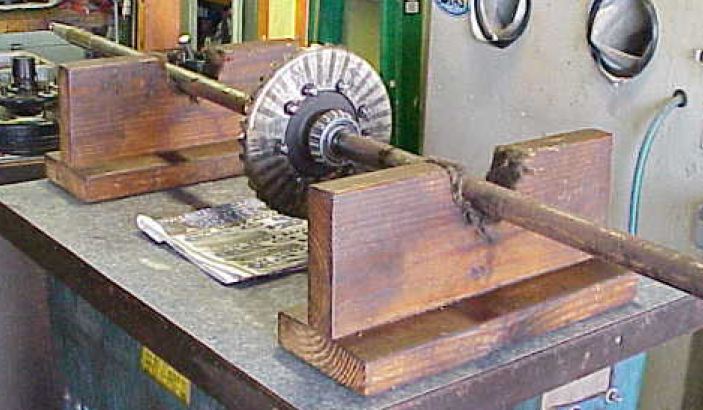
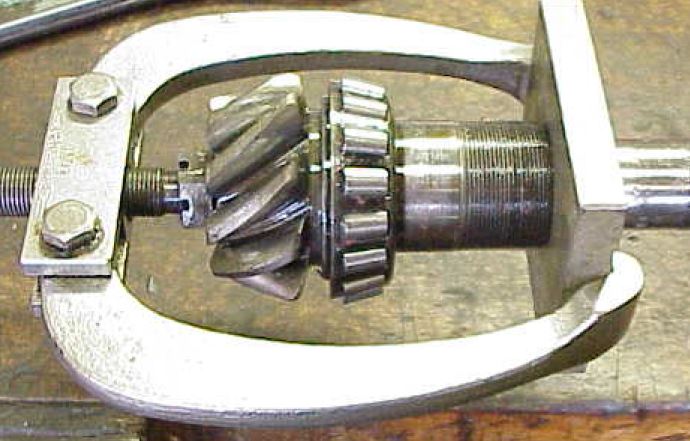
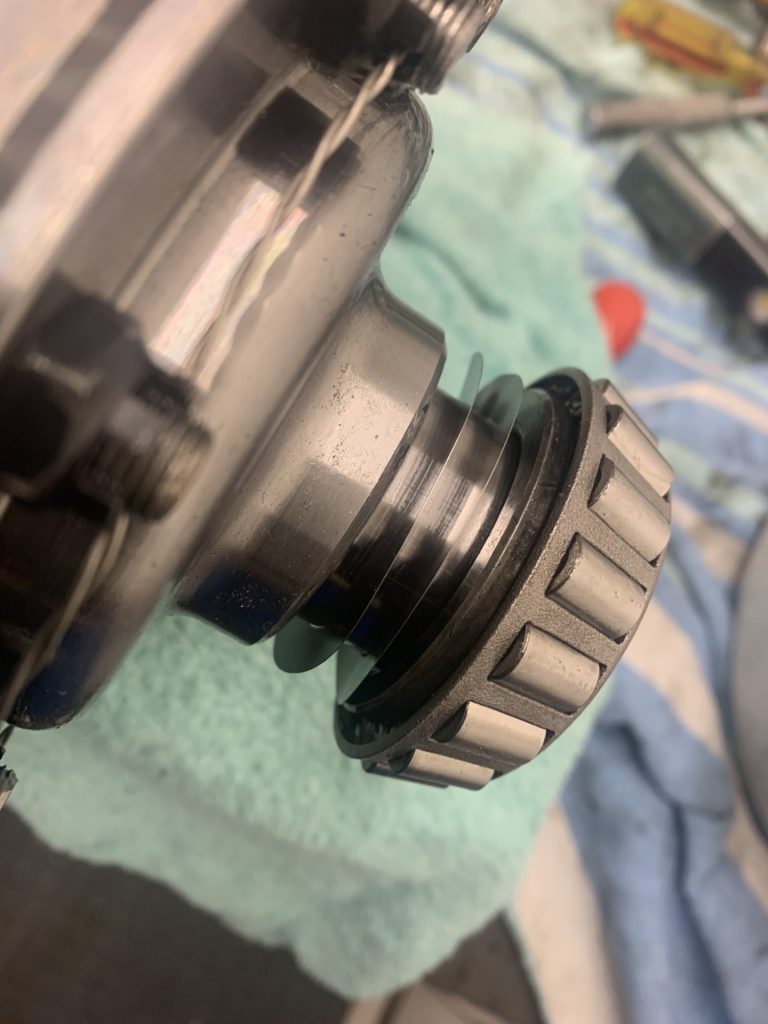
Getting the drive shaft, pinion bearings and its double-sided race out are a pain. I used old pullers I had laying around plus a little heat and WD40. Do not pull on the pinion teeth, they chip.
The new diff is a direct replacement from Hot Rod Works of Texas. This is set up in the modern way where the half shafts are slid in from the outside. On the original Ford / Allard one you have, the diff is assembled around the half shafts, inside-out. You must split the diff to replace a halfshaft. But tolerances and installation are identical.
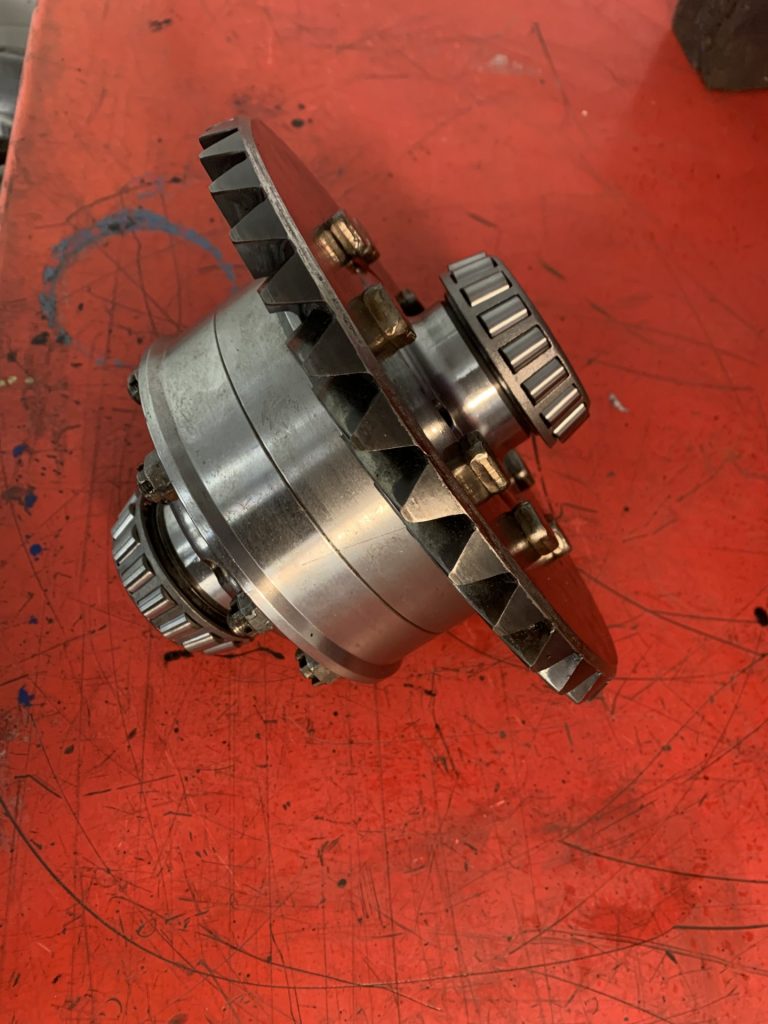
Now take the diff apart. Yours will have the half shafts poking out each side. There are nine high-tensile bolts with slim rectangular heads. The crown wheel will be a tight fit, and if you are changing ratios, remember the crown wheel and pinion must be changed together.
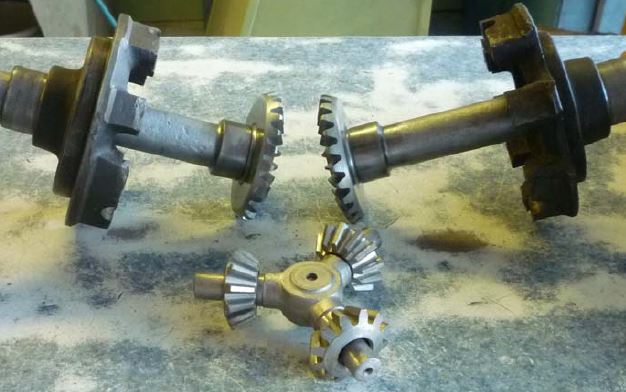
Next check the spider gears and the gears on the ends of the halfshafts they mesh with. Anything broken, burred or spiky? They may need replacing.
I freaked out when I saw my brand-new spider gears were a rattling fit on their shafts. I called the manufacturer and two experts I know to check. Turns out they must be loose. The thing is, they only spin on the shaft when cornering (one wheel moving further than the other), flung outwards against shim washer. They are buried inside a diff, and what oil reaches them tends to be thrown outwards too, so they are better off slack. Every day’s a school day.
Reassembly of diff
If the halfshafts and spider gears are all fine, reassemble the diff, gears, and in your case, halfshafts and crown wheel. Bolts are torqued to 35ft/lbs, heads pointing round the circumference, and wired. One of my bolts was stripped, but Belcher’s rescued me with new old stock.
Extreme Patience Part 1… Setting side-to-side clearance of diff in banjo.
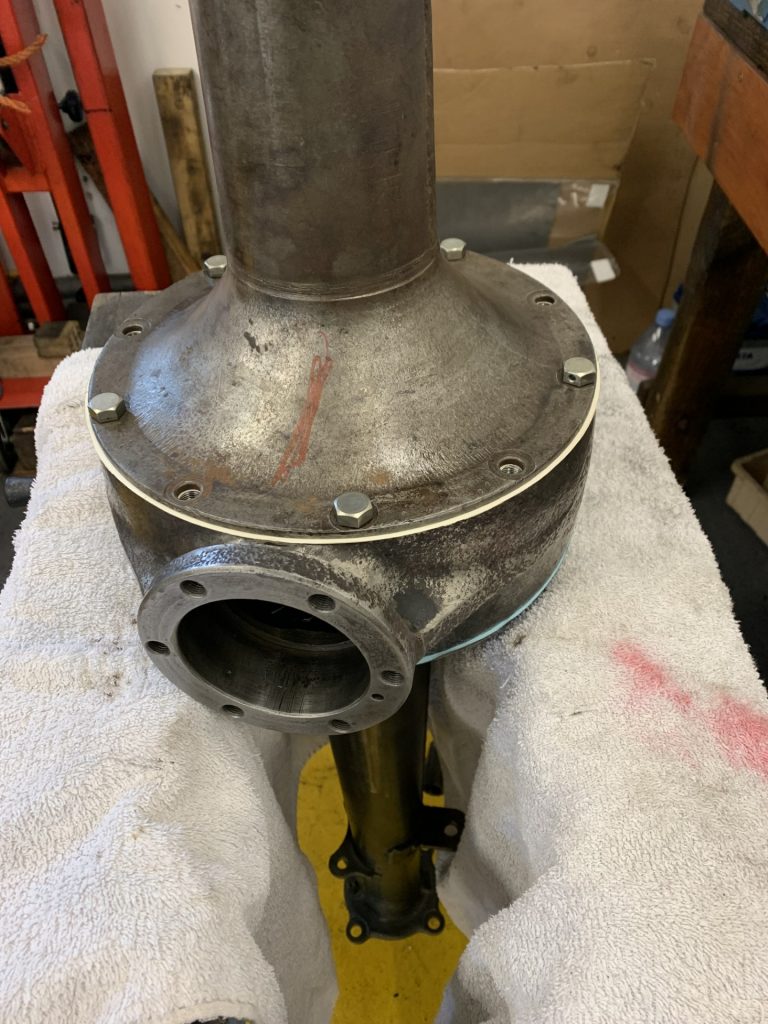
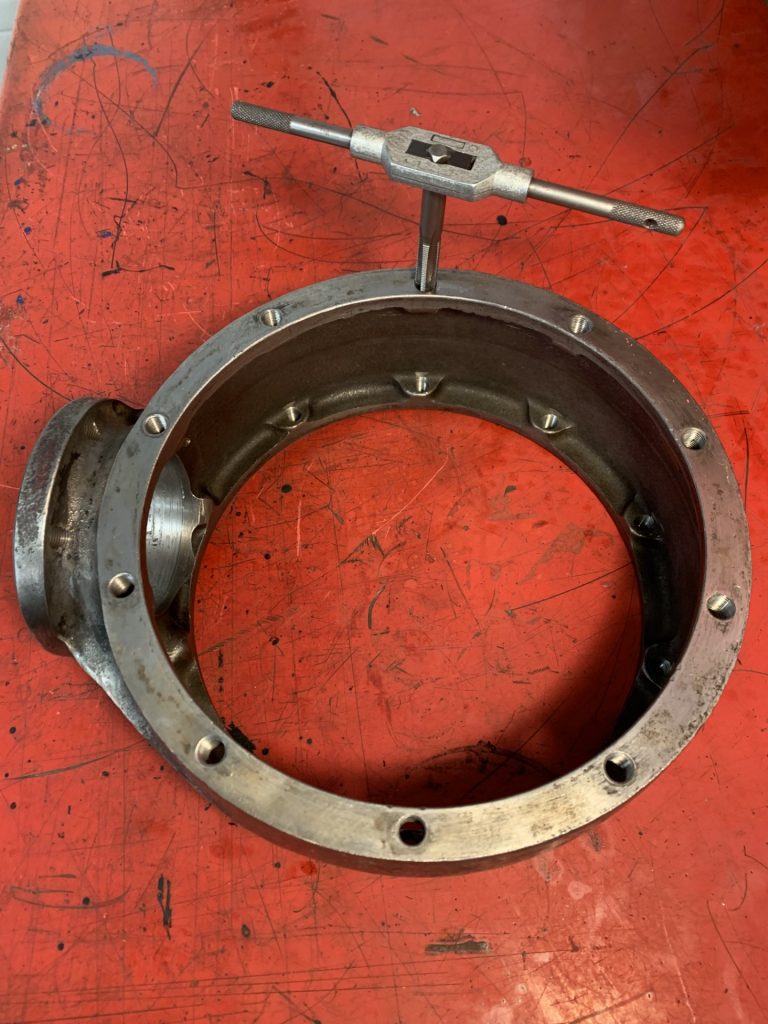
Once the diff carrier bearings in place but without the pinion gear, we start by fitting the diff in its banjo (the middle section) and the two axle casings. Yours will have the half-shafts attached.
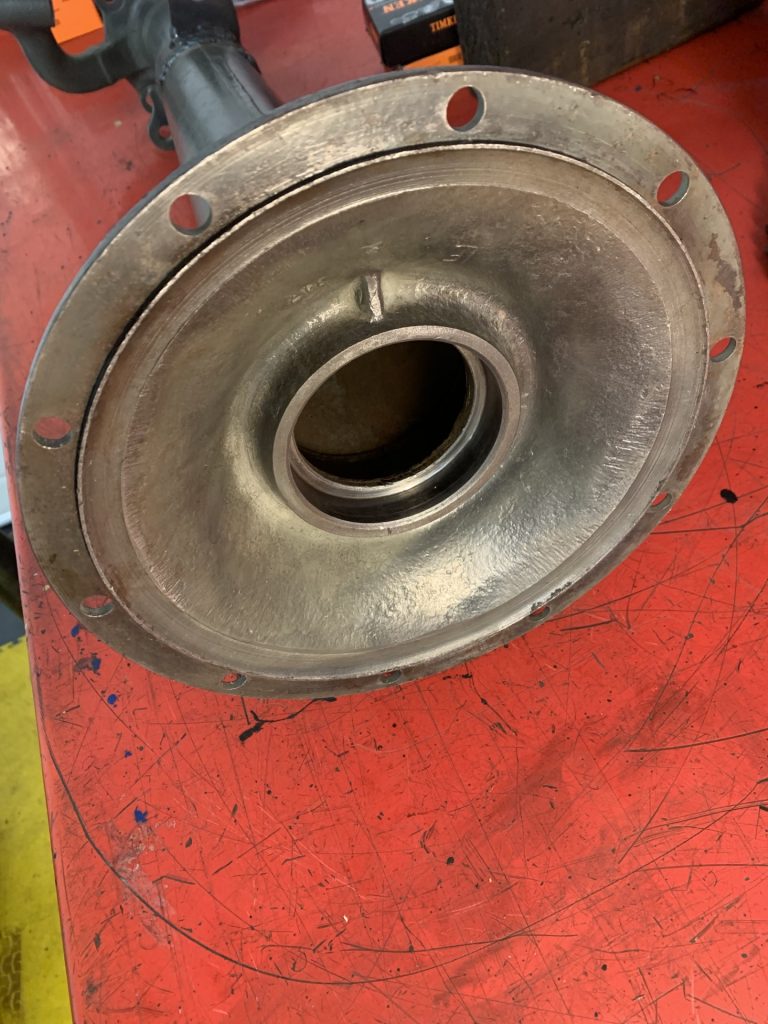
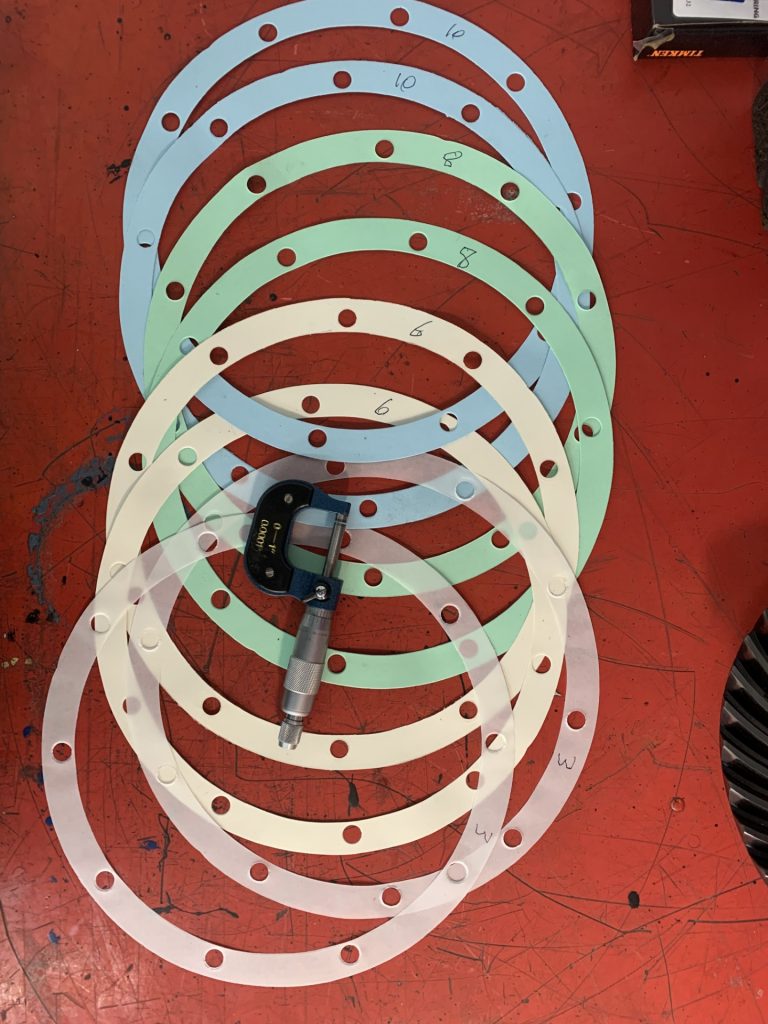
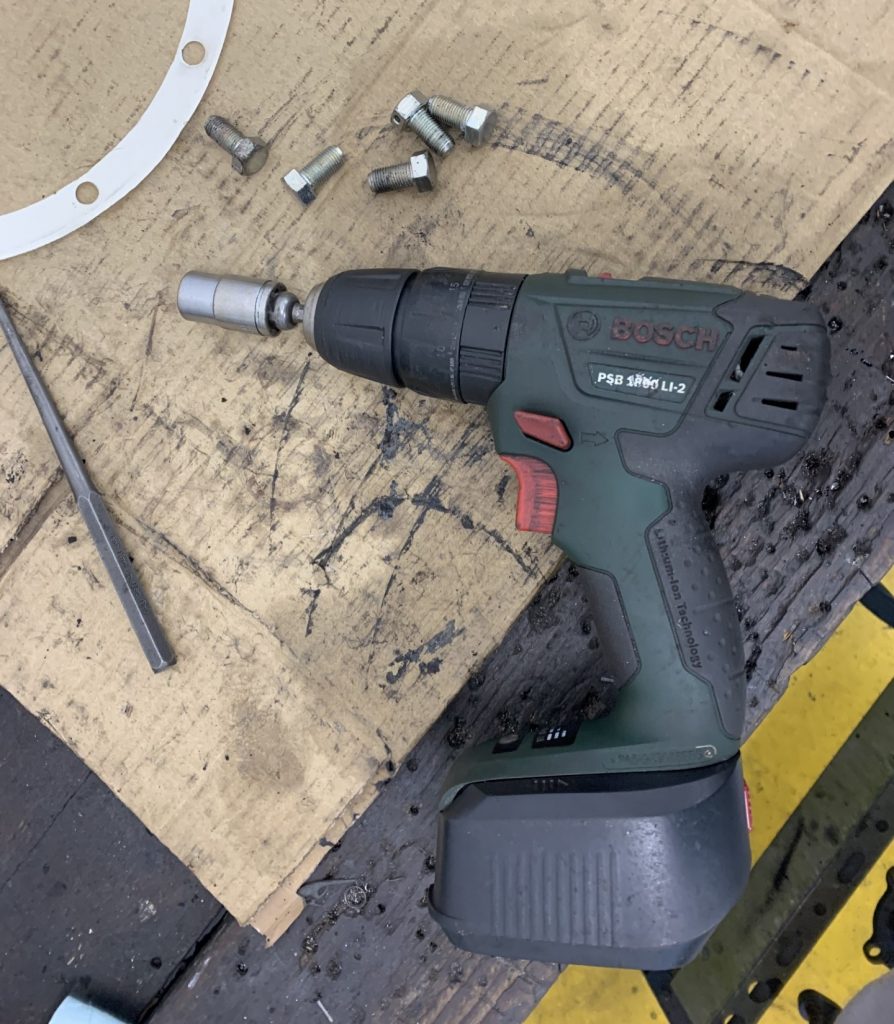
Make sure you bolt them up in the same positions they came apart. The aim is to set correct clearance side-to-side. Banjo gaskets come in different thicknesses from 3 thou to 10 thou. Start with total gaskets of say 14-16 thou on each side, and bolt up both axle casings to the banjo, torquing those super-clean oiled bolts to 35 ft/lbs. Be careful, these are special Ford bolts with deep heads and a tiny unthreaded section under the head to prevent oil seepage.
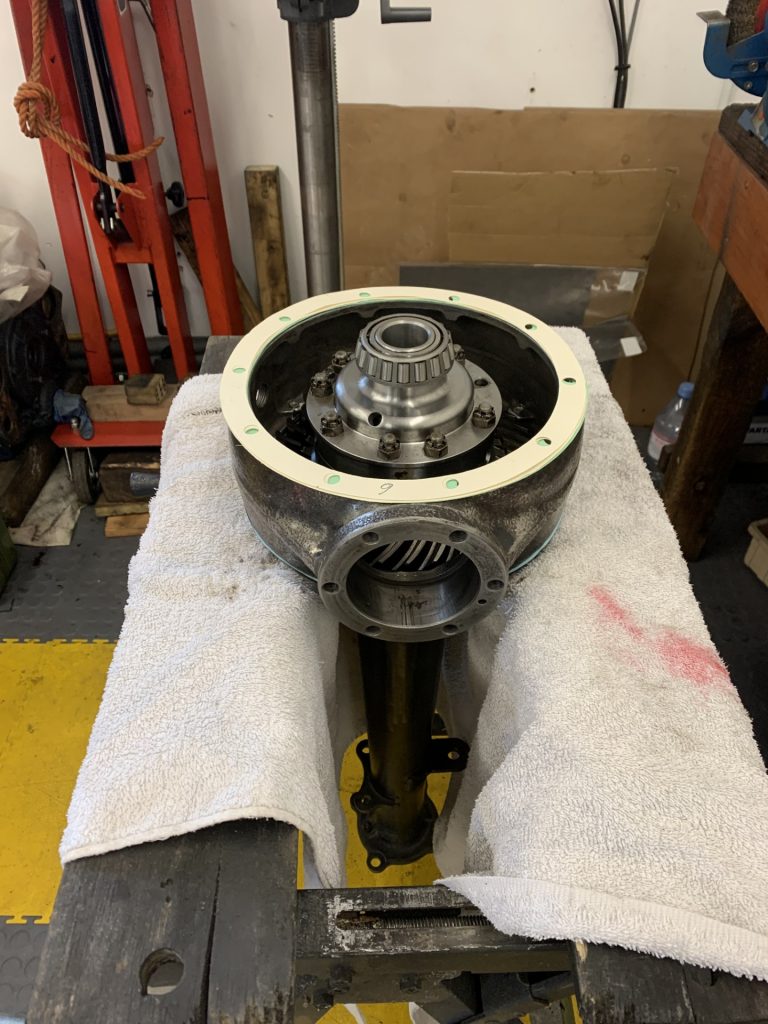
The book says the carrier “preload” should be 20 inch/pounds. (Note, not foot/pounds). Which means the diff should not spin freely until you apply a force of one pound at a 20-inch radius – hard to find a tool to measure that. So put your thumb through the pinion bearing hole and try to turn the crown wheel. (I found this easier with the axle vertical).
Spins freely? That’s too loose. Remove a gasket from the side without the diff – the easy side to manoeuvre. You should just be able to move it with a British Standard Allard Owner Thumb, a force of about 5 lbs at the 4 inch radius of the crown wheel.
Keep taking apart and changing gasket thicknesses on one side until you get there.
It took me maybe six attempts. Make a clear note of the total left plus right gasket thickness. Let’s say you get 26 thou. That’s just an example. Write it in blood on the wall so you don’t forget.
Extreme Patience Part 2: Installing pinion and setting preload.
Take it all apart again. The book says to hold the banjo in a vice across its flats, never across the circle, as it can be distorted oval.
Reassemble the pinion (the small gear on the driveshaft) and all the bearings, ensuring that they are all seated properly and well oiled. I find it easier to hold the drive shaft in the vice and let the banjo turn as I do not have a torque wrench that will go as low as the “preload” which is again 20 inch-pounds.
A plain washer, a big nut, a tab washer and another big nut. On my ’32 axle, they are 2 1/8” nuts but Allard owners typically have less impressive nuts.

I used an old wooden rule, measured 20 inches from the centre and hung a bottle of water weighing exactly a pound on it. Tighten the first nut until the bottle just stays, then tighten the lock nut really hard against it. This will change the preload and I think I repeated at least 6 times before folding over the new tab washer.
Fit the driveshaft, torque the nut to 50 ft/lbs and split-pin so one end is up and over the shaft. There isn’t much clearance so ends going around the nut may foul. Trial fit the assembly with the left axle casing and diff to make sure.

At this stage you need to fit new oil seals all the way out inside the axle casings. I made something out of an old scaffold pole and a threaded bar. Delicacy plus Force equals “Good Luck.”
Extreme Patience Part 3: Assembling axle and setting backlash
This is where you need a strong helper. Balance the banjo with driveshaft and fit the diff with halfshafts into the left axle casing. Remember:
- The crown wheel must be on the left side or you will being going backwards fast!
- If you know you need 26 thou of banjo gaskets in total, assemble it with say 10 thou of gaskets on one side of the banjo and the 16 thou remainder on the other.
- Do up the banjo bolts gently as the crown wheel gets contact with the pinion.
Now to set the backlash, which is the play between the crown wheel and pinion. Too much and it will clonk and crash, too little and it will whine and overheat. On modern diffs it is adjusted by moving the pinion gear in and out with shims. On ours, it is done by changing the casing gaskets on the crown wheel side. Thicker gaskets give more backlash (play) while thinner gaskets reduce it.
Every thou added or subtracted on the crown wheel (left) side must be offset by the same amount the other side, keeping the total gasket thickness at our target 26 thou (only an example).
Ideally we mount a dial gauge on the extreme of the pinion nuts and see how much play is felt, targeting 8-10 thou. Others measure it by poking a dial gauge through the filler hole to measure the play at the crown wheel. Either way is hard as both crown wheel and pinion have preload and don’t spin freely.
It took me about 8 attempts, and then I made a big mistake. I ended up with just a 3 thou gasket on one side and 17 thou on the other to meet my own 20 thou target. The backlash was about double the 8-10 thou range but I assumed it would be OK and put it all together. Chump!
Five minutes up the road I realised it was no good – clonk, clonk. And it leaked like a sieve as a 3 thou gasket is too thin. Lots of effing and blinding. I had to take it all apart again.
The answer was to put two 5 thou shims behind the diff carrier bearing on the crown wheel side, widening the diff by 10 thou and requiring 10 thou thicker gaskets to a 30 thou target.
After another few trials and errors, the backlash was set in range with an 8 thou gasket on one side and 22 thou on the other side. Lesson: there is no compromise between the settings.
Remember to drown the spider gears inside the diff with oil before assembly. I also lock-wired all the bolts and drilled one to have a breather pipe. Originally Ford recommend 600-W oil which is like treacle but these days a 140 oil is typical. Now it works and doesn’t whine, clonk or leak.
Thanks as ever to Belcher Engineering for parts and advice and fantastic service.
Other reading:
Vern Tardel published a 52 page (!) book on the subject which you can find on Amazon.
Or check out these websites…
https://www.santaanitaas.org/wp-content/uploads/2019/06/Differential-32-Ford-Rebuild-June-2-2019.pdf
https://www.brattons.com/media/wysiwyg/2OC-Differential_Seminar_-_Re-Edited.pdf